Quick Start
This guide takes you from zero to a working NF instance with data flowing in about 30 minutes. We'll use Docker, which is the fastest path to a running system.
Prerequisites
- A Linux host with Docker Engine installed (see Planning a Deployment for sizing)
- Network access to your building's BACnet, Modbus, or Fox devices (or just follow along without devices to explore the UI)
- A license from Normal Portal (a demo license works fine for evaluation)
Step 1: Deploy NF with Docker
Log in to the container registry
NF container images are hosted on Docker Hub in a private repository. Your registry credentials are available in the Normal Portal under your organization settings.
docker login -u <your-portal-username>
Enter the access token from the portal when prompted.
Start the containers
Clone the SDK repo, which contains a ready-to-use docker-compose.yml:
git clone https://github.com/normalframework/nf-sdk.git
cd nf-sdk
Start the containers:
docker compose up -d
This starts two containers:
- nf -- the Normal Framework application
- redis -- the data store
Verify they're running:
docker compose ps
You should see both containers in the running state.
Note
The NF container uses network_mode: host, so the management
console is available directly on port 8080 of the host -- no port
mapping needed.
Step 2: Access the Management Console
Open your browser and navigate to:
http://<your-host-ip>:8080
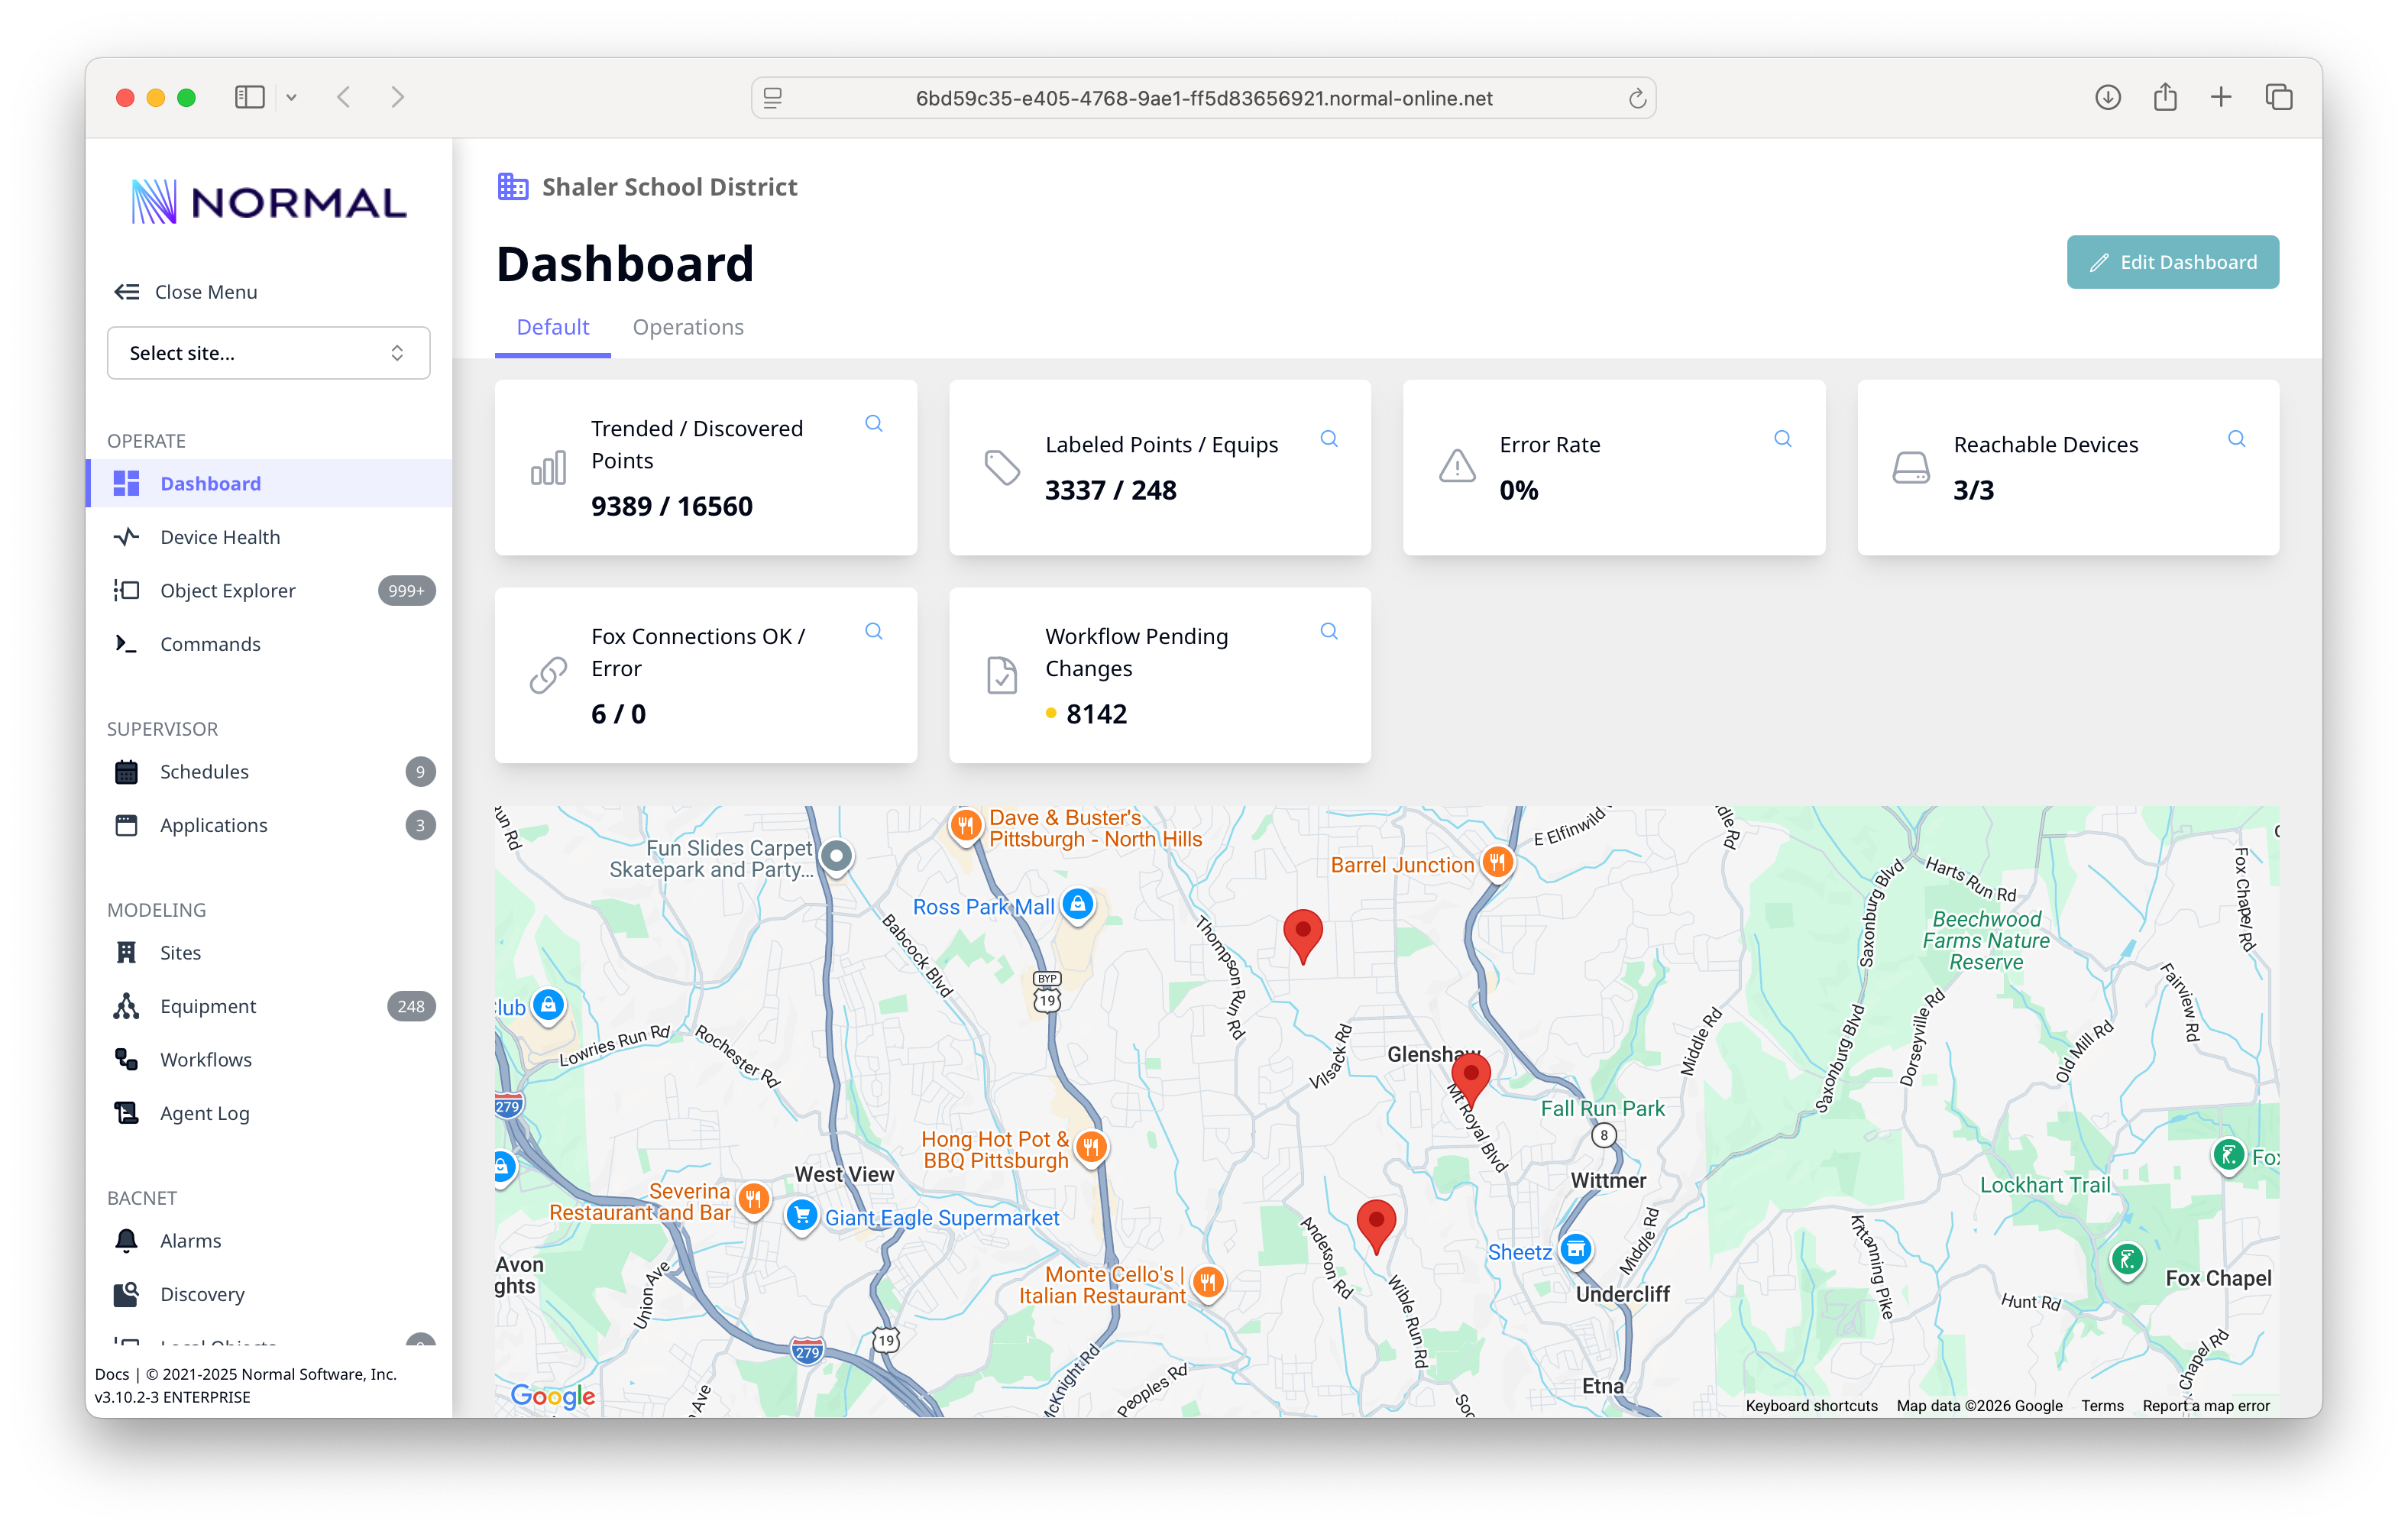
You should see the NF dashboard with the site map and status cards.
Step 3: Activate Your License
Your NF instance needs a license to enable all features.
- Log in to Normal Portal.
- Navigate to your organization and create a license (or select an existing one).
- Click Activate and choose your instance. The portal generates an 8-character activation code (valid for 15 minutes).
- In the NF management console, go to Settings > License and enter the activation code.
The device contacts the portal and confirms activation. You should see a "Licensed" status within seconds.
Enterprise auto-provisioning
If you have an enterprise license, you can skip manual activation.
Set the AUTO_PROVISION_KEY environment variable and the device
licenses itself on startup. See Licensing for
details.
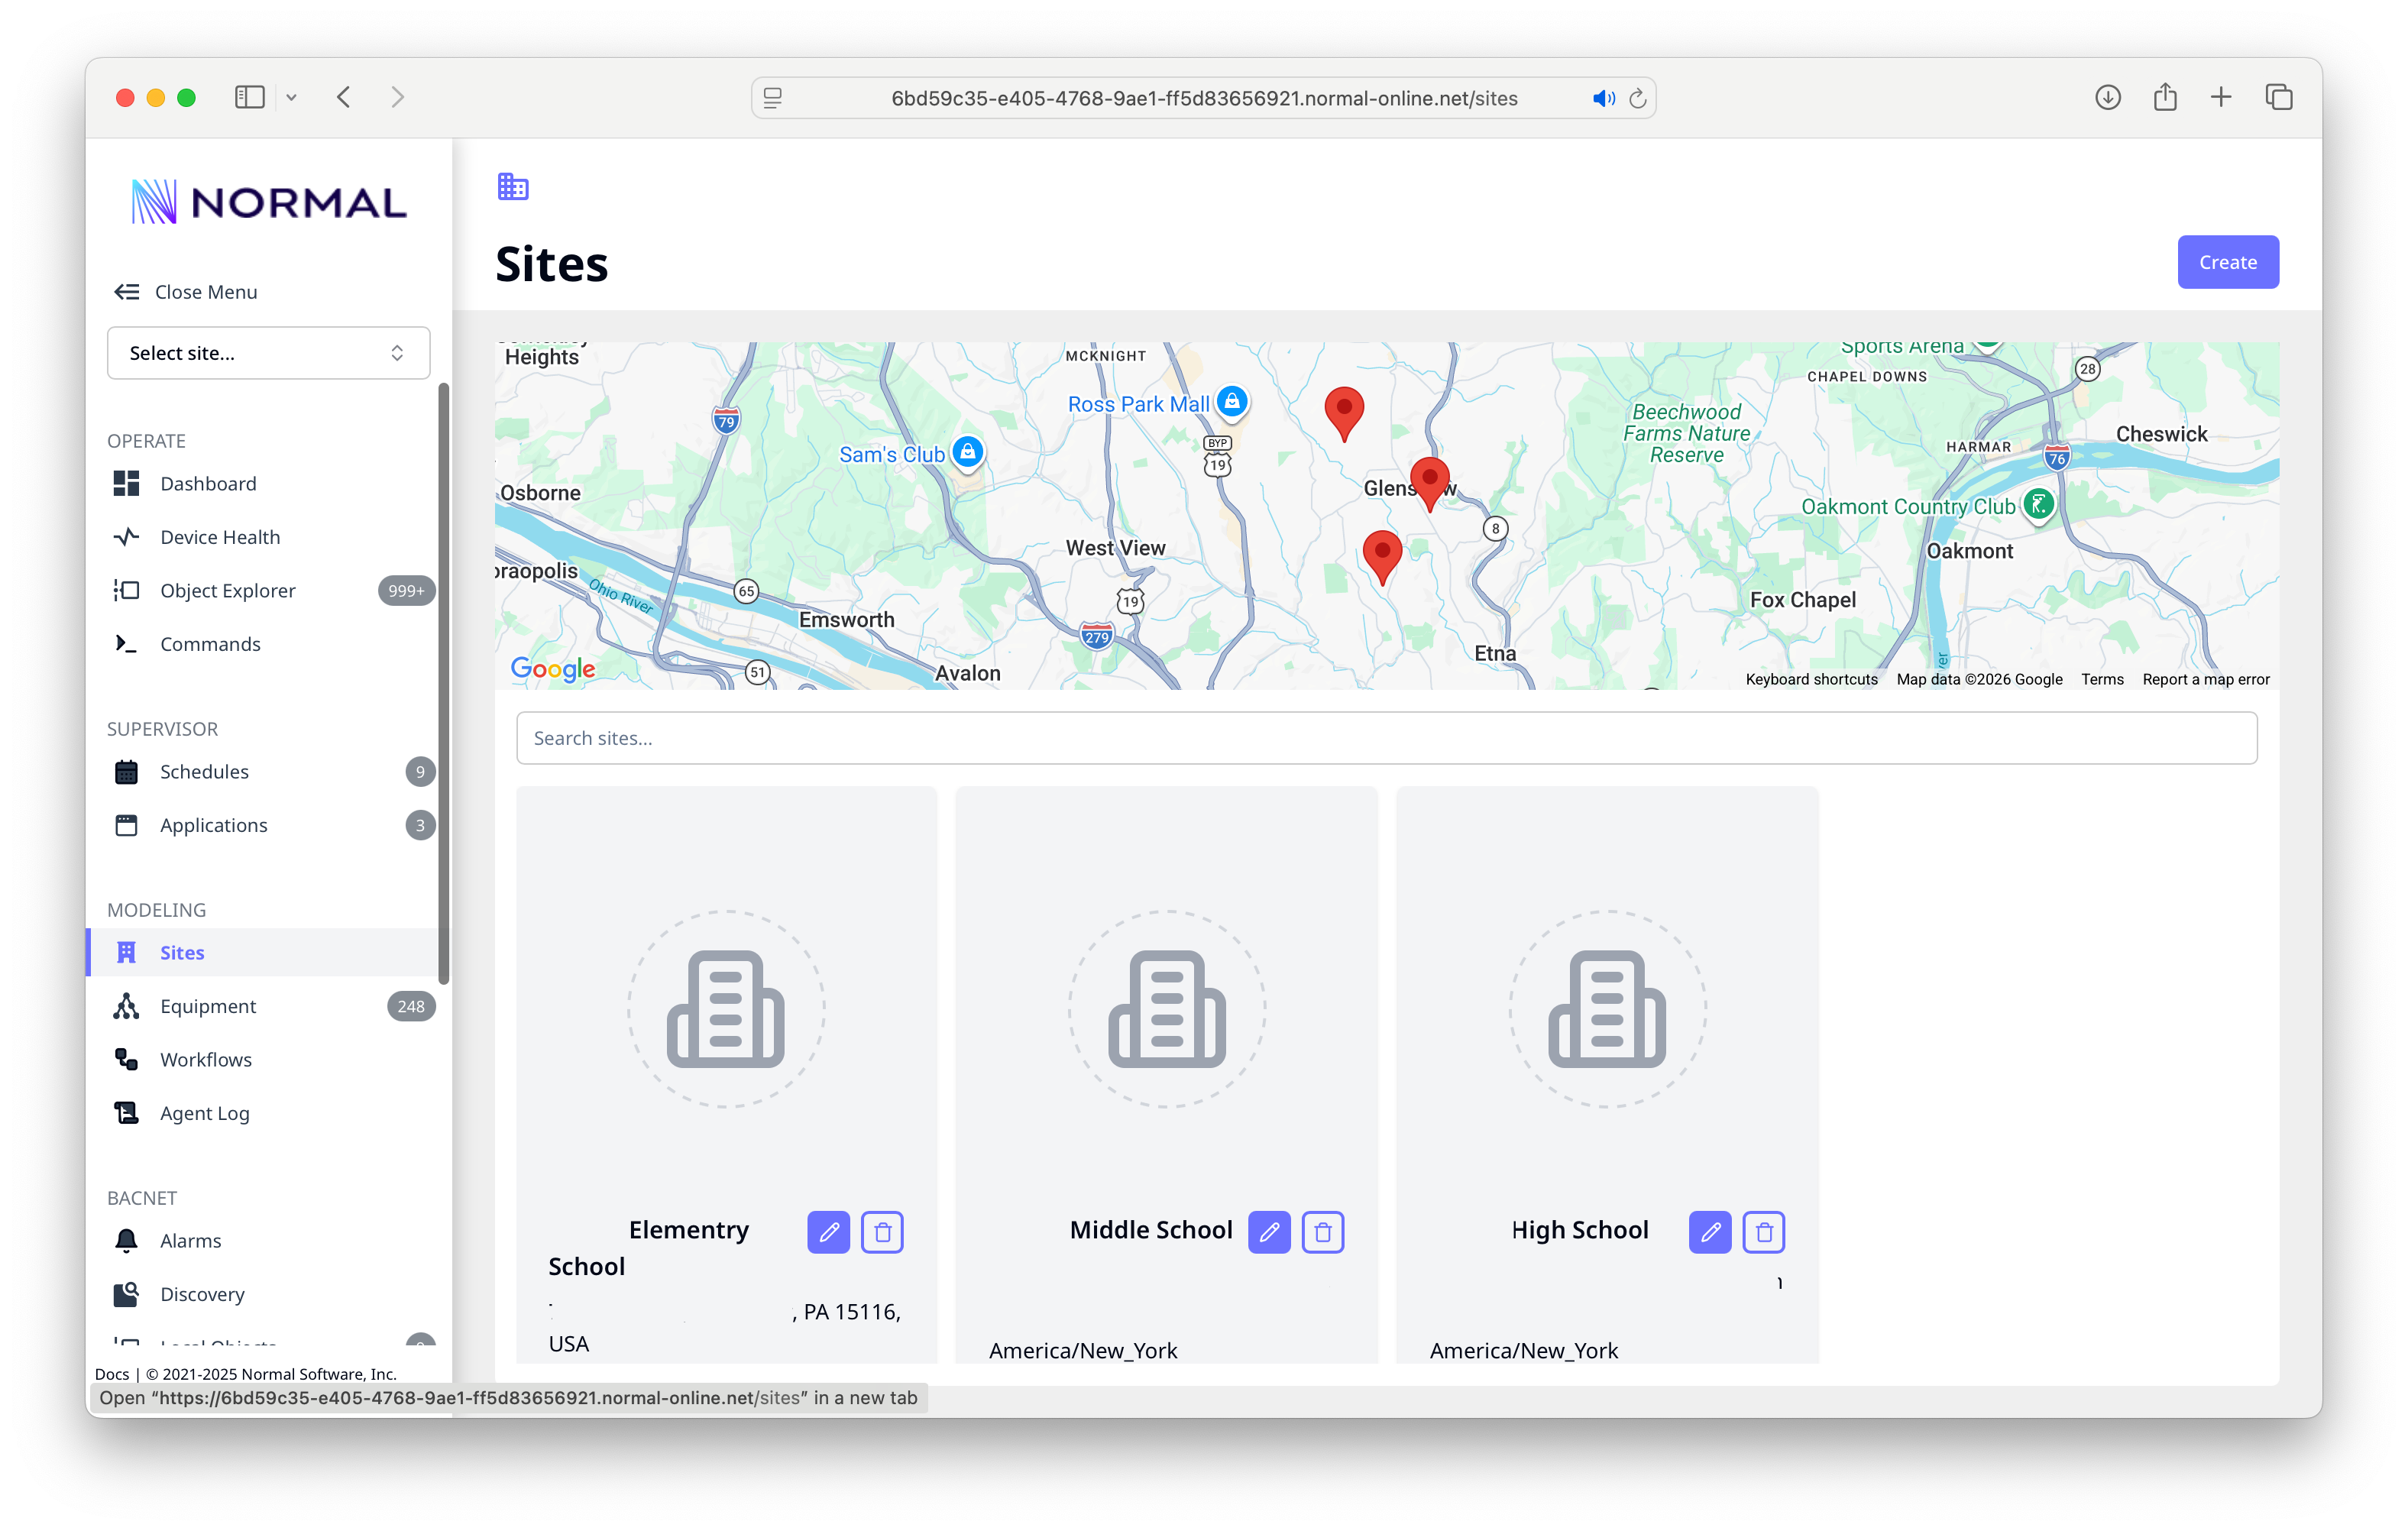
Step 4: Create a Site
Sites represent buildings or physical locations. Creating a site helps organize your points and provides context like timezone and location.
- Go to Sites in the left navigation.
- Click Add Site.
- Enter:
- Name: Your building name
- Address: The street address (timezone and coordinates auto-fill if address lookup is available)
- Click Save.
Step 5: Configure a Network Port and Discover Devices
BACnet
NF automatically uses the default network interface for BACnet communication. You only need to add a network port in Settings > BACnet > Network Ports if your BACnet devices are on a different network adapter than the default.
- Go to Discovery in the left navigation.
- Click New Scan and run a device discovery. NF sends a BACnet Who-Is broadcast and populates the device list.
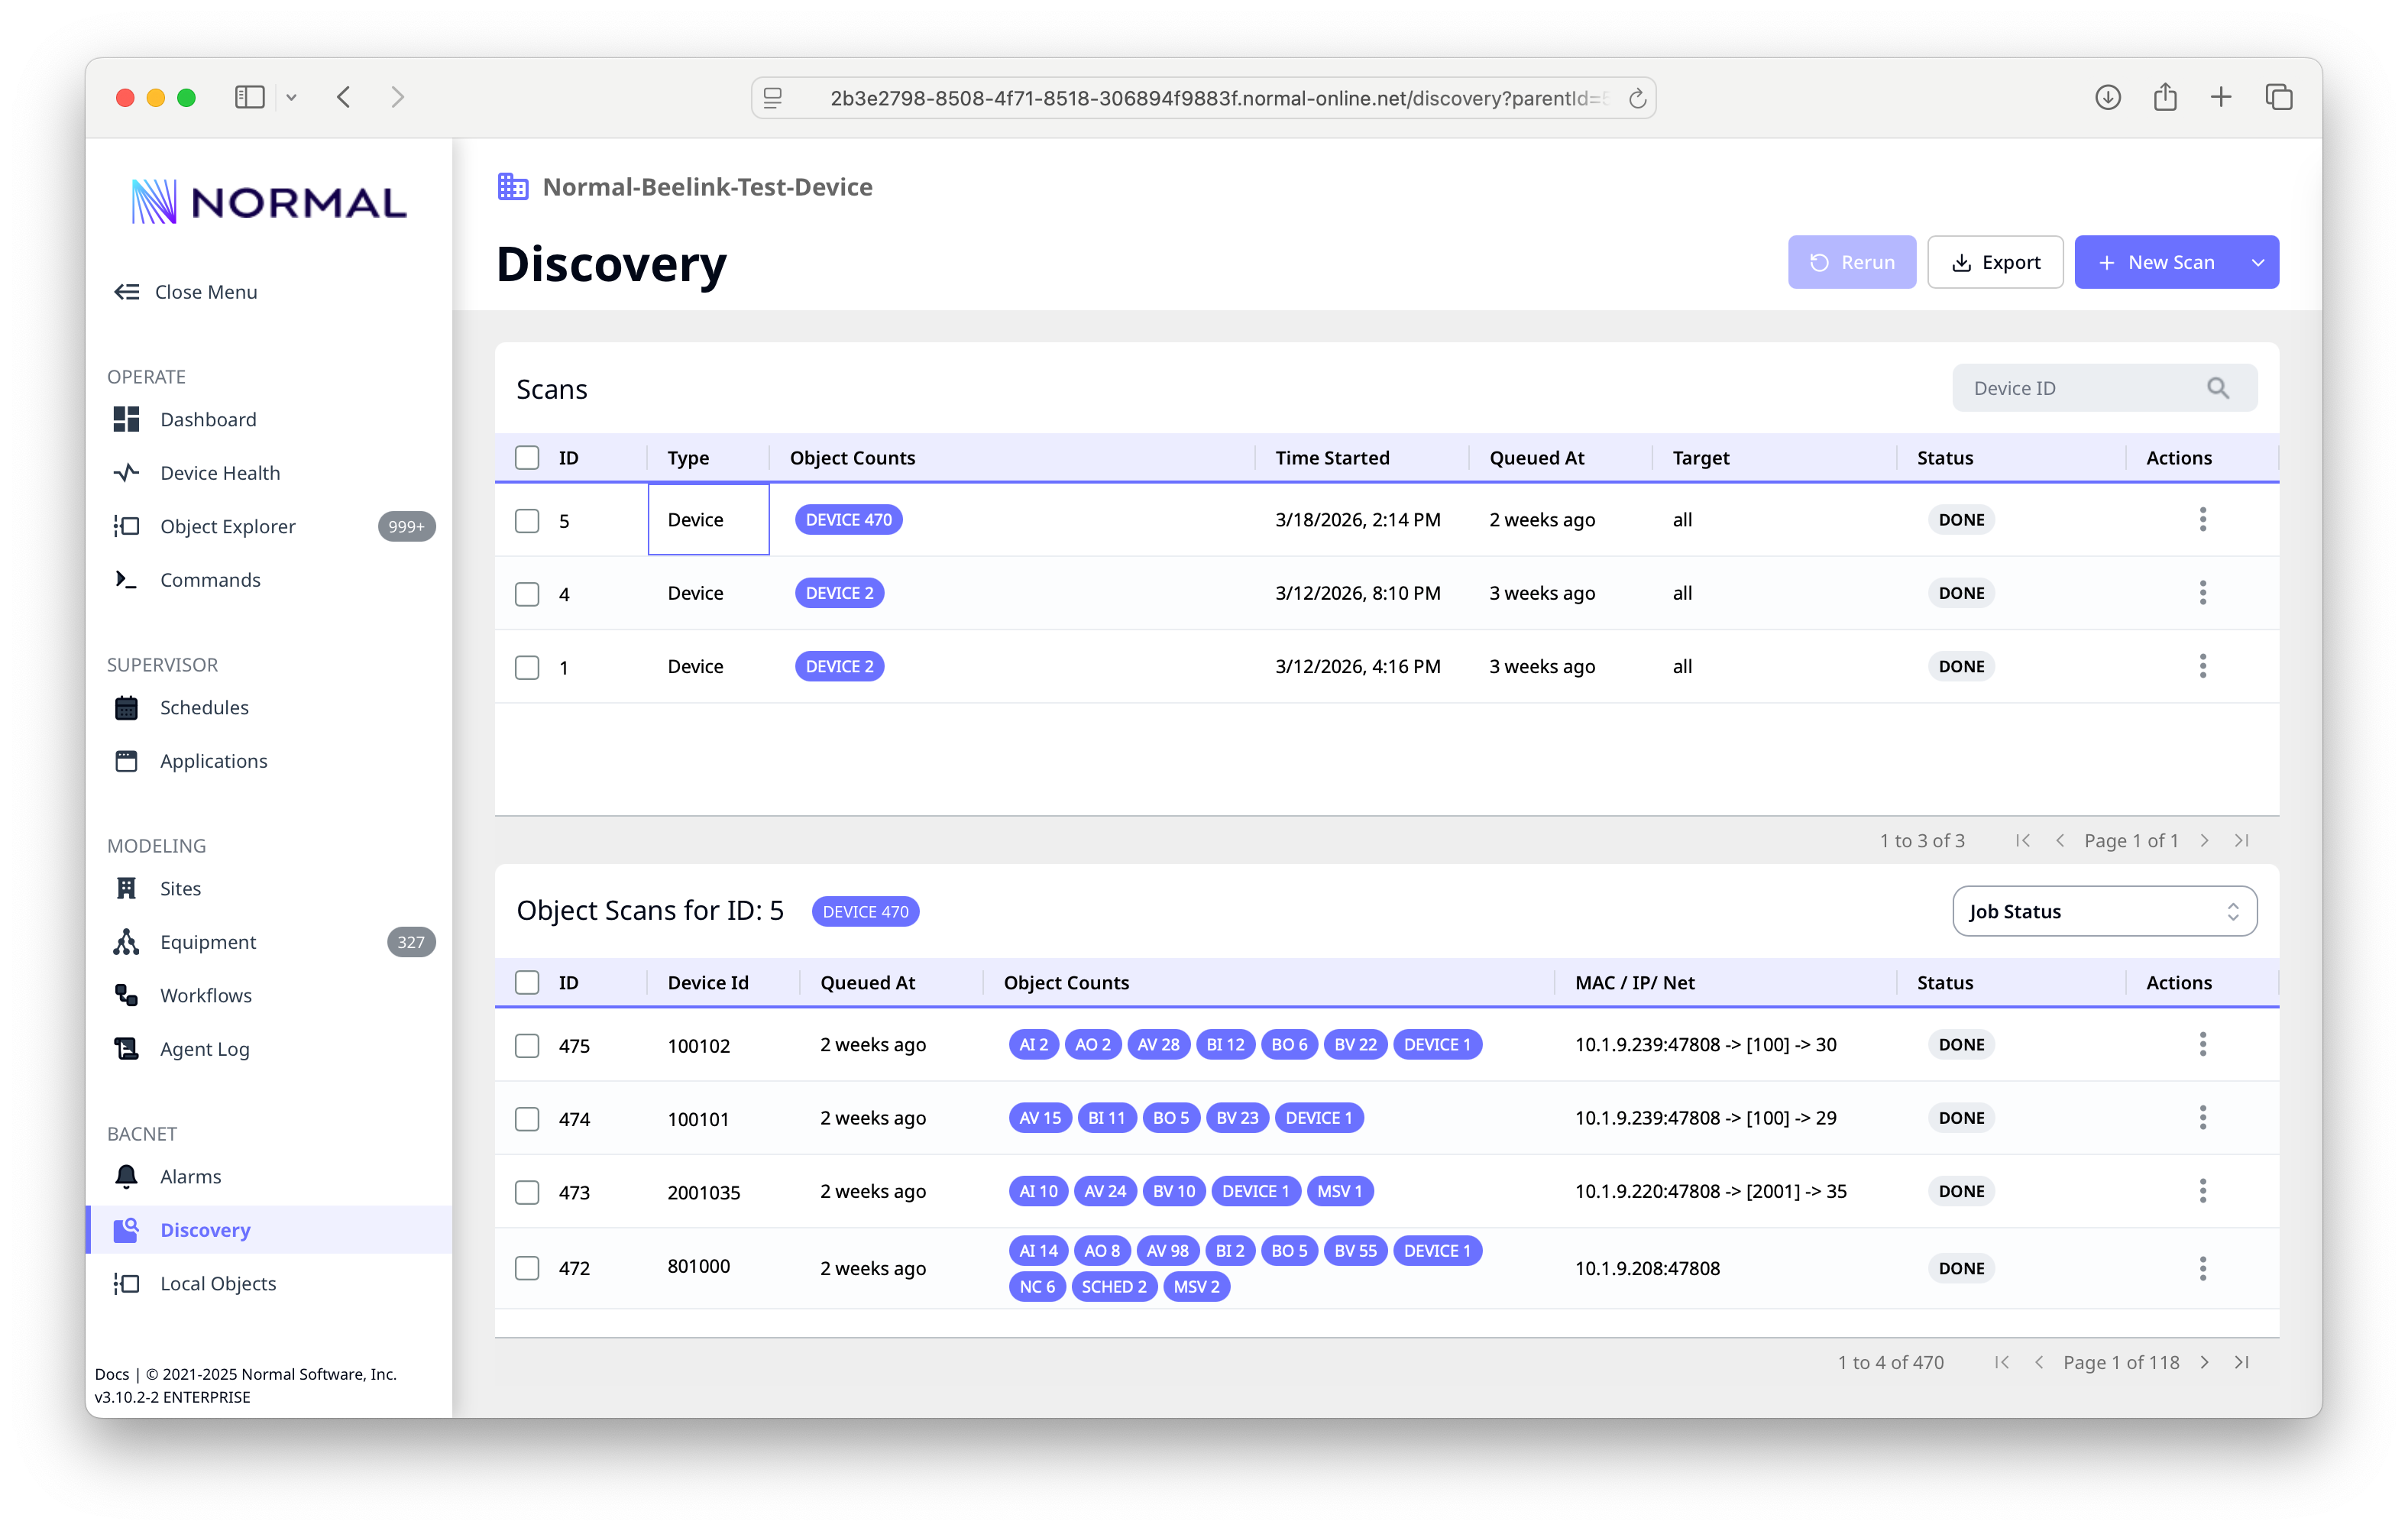
- Select the devices you want to scan and click Scan Objects. NF reads all objects from each device and imports them as points.
Large sites
NF can scan 100,000+ objects in minutes. For very large sites, you can run discovery in the background and continue configuring other settings.
Modbus
- Go to Settings > Modbus.
- Add a device with its IP address and register map.
- See Modbus for detailed register configuration.
Fox (Niagara)
- Go to Settings > Fox Connections.
- Add a connection to your Niagara station.
- See Fox for connection setup details.
Step 6: Verify Your Points
After discovery, your points appear in the Object Explorer.
- Go to Object Explorer in the left navigation.
- You should see your discovered devices and their objects listed.
- Click on any point to see its current value and properties.
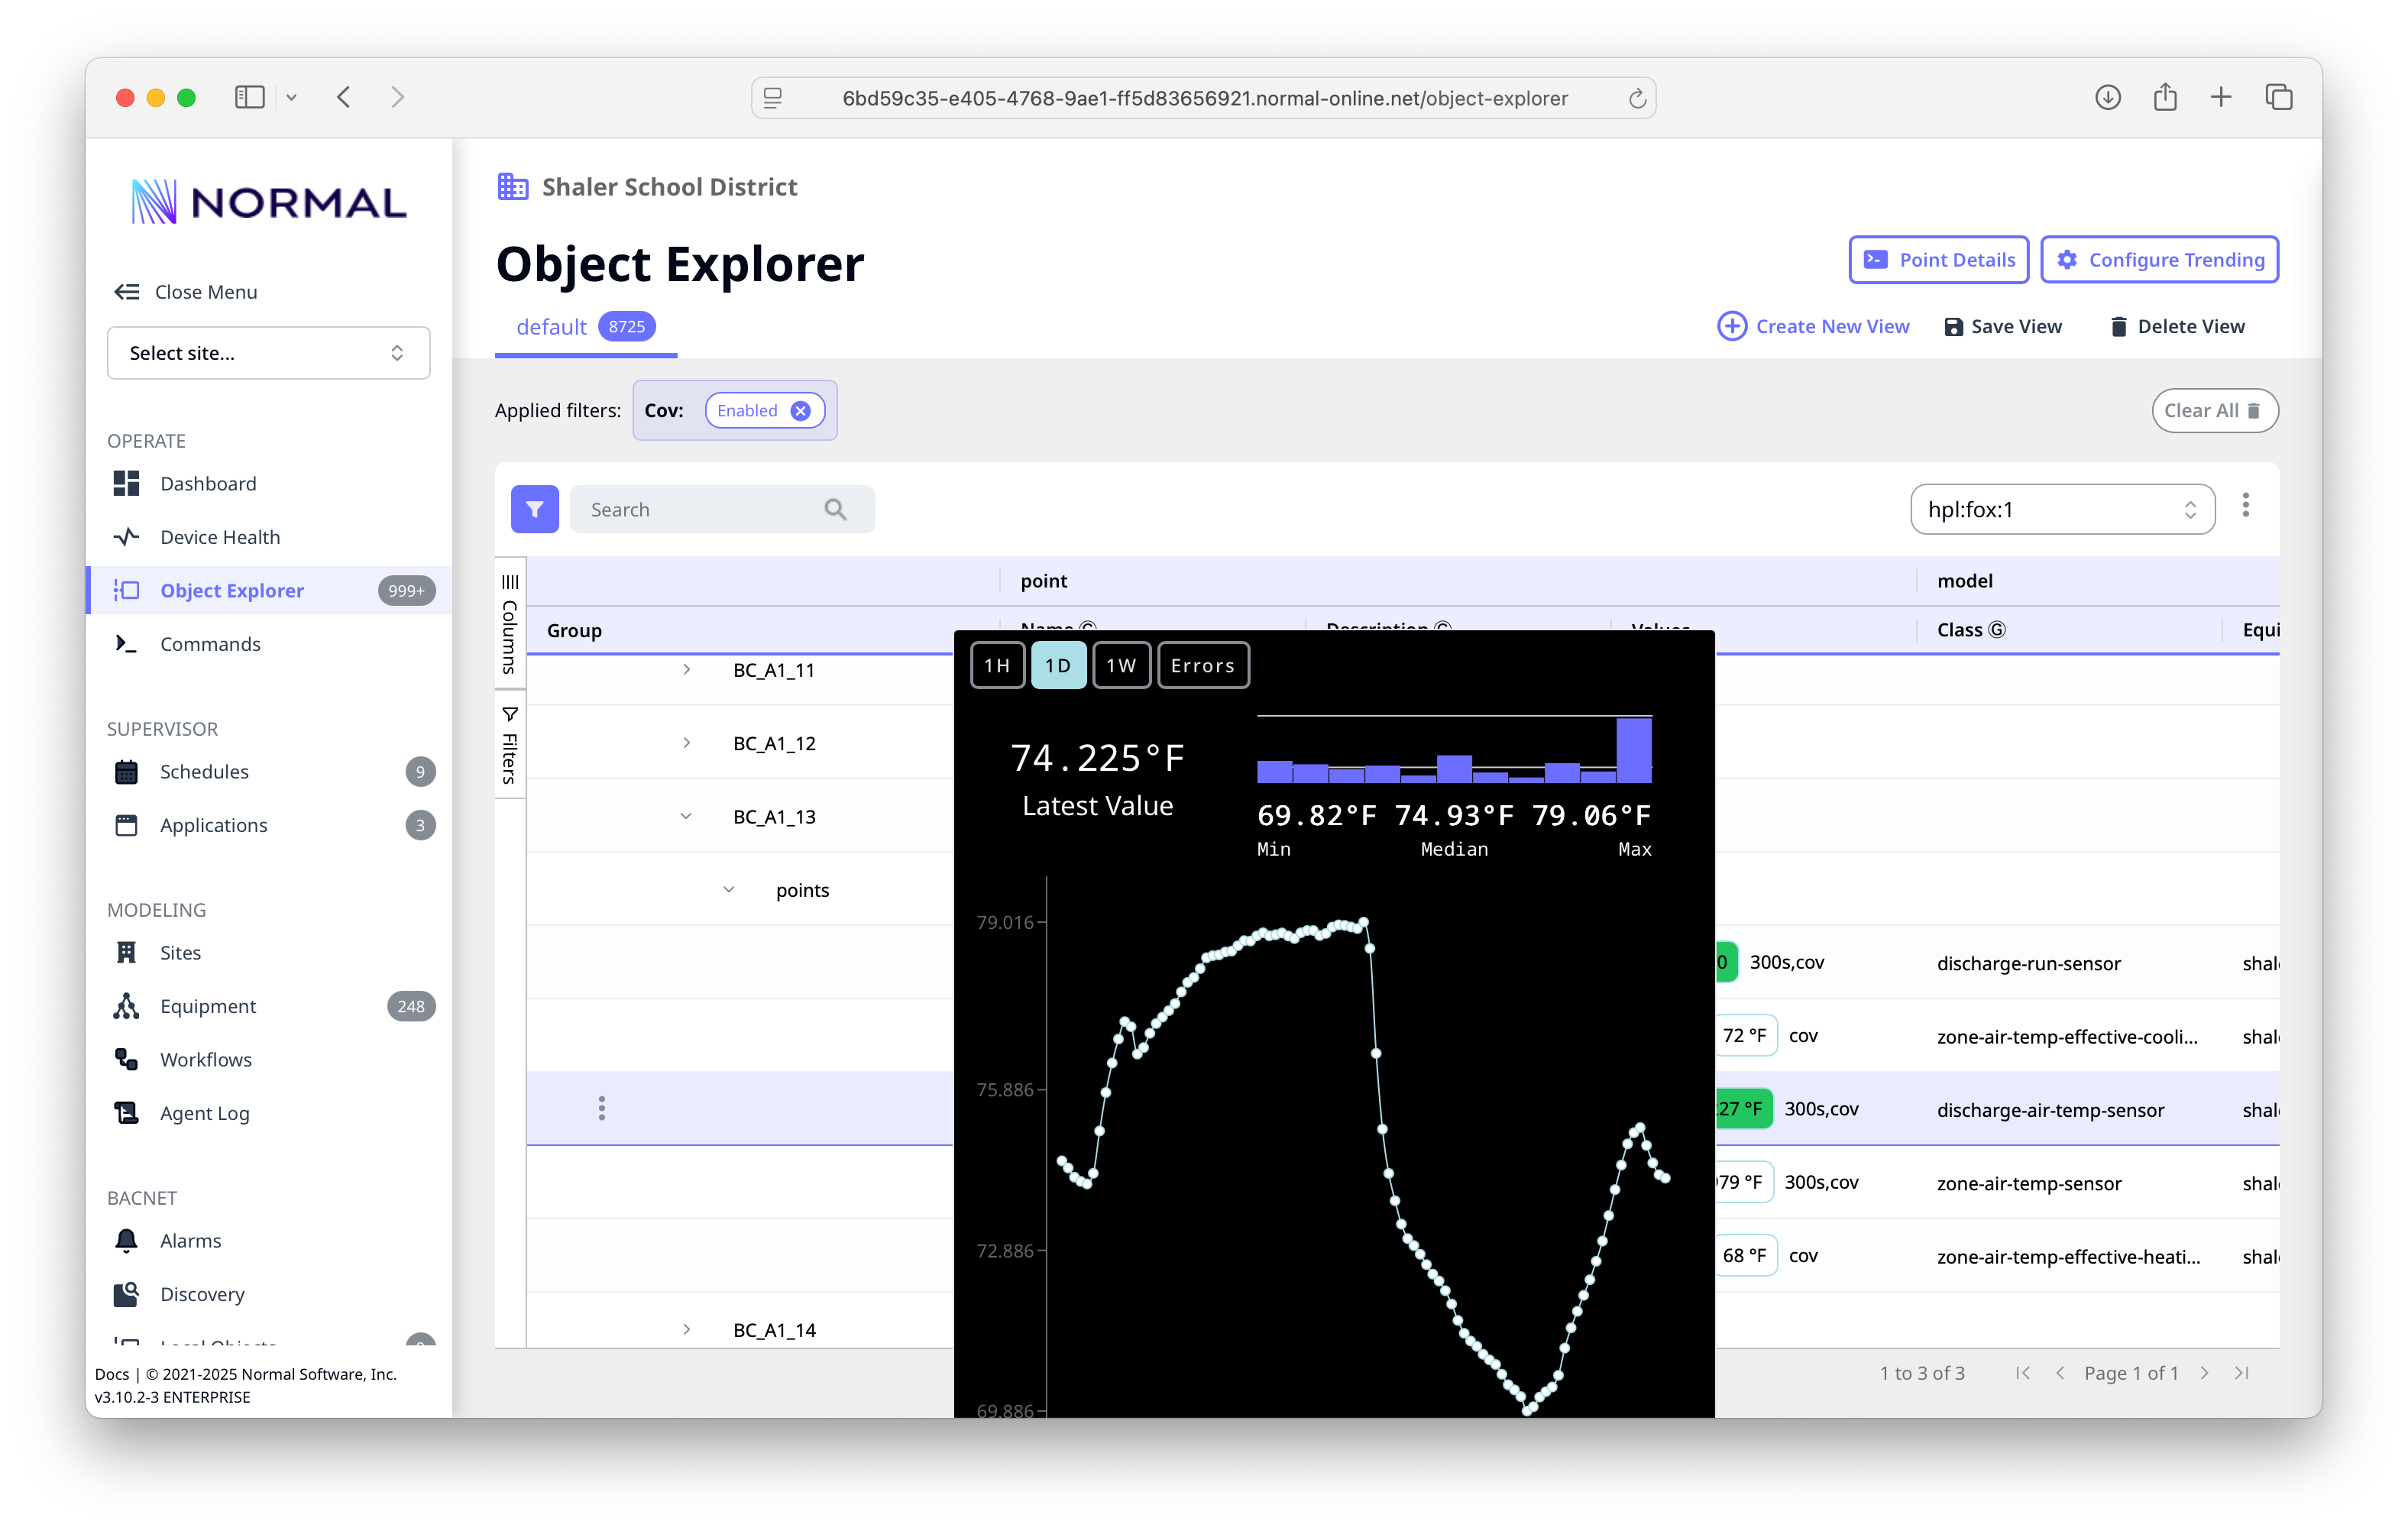
You're up and running!
If you can see your points in the Object Explorer with current values, NF is successfully communicating with your building systems.
Step 7: Configure Polling
By default, discovered points don't poll automatically. Set up data collection:
- In the Object Explorer, select points you want to poll (use filters or multi-select).
- Right-click and select Set Poll Period.
- Choose an interval (e.g., 60 seconds for most sensors, 300 seconds for slower-changing values).
Points with active polling show live values updating in the explorer.
What's Next?
You now have NF deployed, licensed, and collecting data. Here's where to go from here:
| Goal | Guide |
|---|---|
| Explore the management console | Console Tour |
| Normalize your data with Brick/Haystack | System Modeling |
| Build a custom application | SDK Overview |
| Export data to the cloud | Sparkplug or Timescale |
| Set up recurring schedules | Schedules |
| Production hardening & next steps | After You Deploy |
Troubleshooting
Can't access the management console on port 8080?
- Verify the container is running:
docker compose ps - Check that port 8080 isn't in use by another service
- Ensure your firewall allows TCP 8080
No devices found during BACnet discovery?
- Confirm the NF host is on the same subnet as BACnet devices (or that a BBMD is configured)
- Check that UDP 47808 is not blocked
- Try a directed discovery to a specific device IP instead of broadcast
License activation code not working?
- Codes expire after 15 minutes -- generate a fresh one in the portal
- Ensure the NF host can reach
portal.normal-online.netover HTTPS